Tampilkan postingan dengan label Dessert. Tampilkan semua postingan

Sabtu, 18 Februari 2012

Flourless Peanut Butter Chocolate Chip Banana Cookies!


Flourless Peanut Butter Chocolate Chip Banana Cookies

Nothing compares to a home baked cookie.  The aroma of peanut butter or chocolate chip cookies baking is intoxicating.  It draws anxious kids and adults alike to the kitchen hoping to grab one of the first warm cookies from the oven.

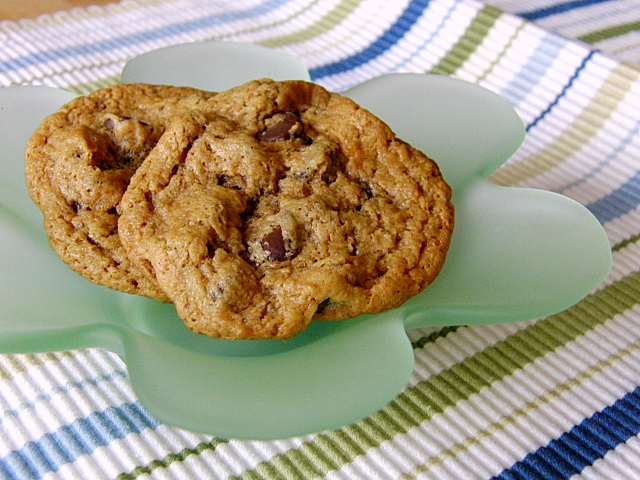
With the hundreds of thousands of cookie recipes in cookbooks, magazines, on food blogs, and passed down through generations of home cooks, there is a cookie recipe that appeals to everyone.  Add Flourless Peanut Butter Chocolate Chip Banana Cookies to your list of must try cookies.  With a short list of ingredients, the peanut butter, chocolate, and banana flavors shine in this chewy cookie.

Bake a batch today.  The most inviting kitchen is one with a full cookie jar.

Flourless Peanut Butter Chocolate Chip Banana Cookies

adapted from this recipe from Bon Appetit, September 1999

makes about 30 (3-inch) cookies

1 cup creamy peanut butter
1 cup packed light brown sugar
1 ripe banana, mashed
1 large egg
1 teaspoon baking soda
1 teaspoon vanilla extract
1/4 teaspoon cinnamon
1 cup semisweet chocolate chips

Preheat oven to 350 degrees.  Line 2 large baking sheets with parchment paper and set aside.

In a large bowl, combine peanut butter, brown sugar, banana, egg, baking soda, vanilla extract, and cinnamon using a standing or hand held mixer.  Beat for about 3 - 4 minutes.  Add the chocolate chips and mix to just combine.

Drop by rounded tablespoons of dough on baking sheets about 2 inches apart.  Bake for 10 - 11 minutes or until cookies are golden brown and still slightly soft in the middle.  Cool on sheets for 2 - 3 minutes then transfer to a cooking rack.  Store in an air tight container for 3 - 4 days or freeze for up to 2 months.

Kamis, 28 April 2011

Peanut Butter Power Bites

Peanut Butter Power Bites
I am teased by my family that I don't need a cellphone.  More times than not, I miss their calls or fail to answer their text messages.  It is not that I am always ignoring them, but there are times I don't want to be so...accessible.

But today while I was cooking for a new EAT! client, my phone vibrated with 2 test messages within minutes of each other.  Being that it was during school hours and both messages were from my daughters, I decided to take a look at them.  The girls texted me saying how much they and their friends loved the Peanut Butter Power Bites I packed in their lunches.  A friend of one of my daughter's (and a frequent dinner guest at our house) even stated that she would do anything to get a few more of the crunchy and chocolatey peanut butter treats.

I made a batch of 50 Peanut Butter Power Bites yesterday afternoon and there are about 15 left.  It looks like it is about time to make some more.

Peanut Butter Power Bites

adapted from this recipe in the April, 2011 All You magazine

makes 50

4 tablespoons butter
1 1/3 cups peanut butter
1/2 cup confectioners' sugar
1/3 cup honey
2 teaspoons vanilla extract
3 cups Rice Krispies cereal
2 1/2 cups oats
1 cup mini chocolate chips

Melt butter in a medium saucepan over medium heat. Remove pan from heat and stir in peanut butter, confectioners' sugar, honey and vanilla. Stir in Rice Krispies and oats and allow mixture to cool.

Stir in the chocolate chips. Form mixture into 1-inch balls, pressing tightly to form balls. Store in refrigerator.

Sabtu, 29 Januari 2011

The Ultimate Banana Chocolate Chip Muffin

The Ultimate Banana Chocolate Chip Muffin
 Most of my Saturday mornings start off with baking.  I let the dogs out and hope this is the morning when one of them will finally bring the paper in for me.  With my first cup of coffee in hand, I pick out which muffin, scone or coffee cake to bake.

Overripe bananas end up in my freezer.  One of my brother-in-laws once commented that my sisters and I always have a bunch of black bananas in our freezers.  Stop by any one of our homes and check the freezer.  There is a 99% chance that you will find frozen bananas waiting to go in smoothies or better yet be the basis of the recipe for The Ultimate Banana Muffin.

I received this recipe from my friend Amy Baragar who I worked with at a small gourmet cafe in our town.  We had a fun time cooking and baking together and would make batches and batches of these muffins.  I was skeptical of the recipe at first for 2 reasons:

1.  it contains no eggs
2.  it calls for LOTS of bananas

But the recipe makes the moistest, bananaiest muffins I have ever tasted so I will never go back to my old recipe again.  I like my muffins to be homemade but look professional so I use these muffin papers and this sanding sugar.

The next time you find you have a few black bananas on hand, whip up a batch of The Ultimate Banana Chocolate Chip Muffins.  If you are out of black bananas, stop by my freezer.  I am sure I will have a bunch to lend you.


The Ultimate Banana Chocolate Chip Muffin

makes 14 muffins

2 cups flour
1 cup brown sugar, lightly packed
1 teaspoon baking soda
1 teaspoon baking powder
1 teaspoon salt
1/2 cup oil - I use extra light virgin olive oil
4 large, very, very ripe bananas
1/2 cup mini chocolate chips
sanding sugar or Sugar In The Raw Turbinado Sugar for sprinkling

Preheat oven to 350 degrees.  Line a regular sized muffin tin with muffin papers and set aside.

In a large bowl, whisk the flour, brown sugar, baking soda, baking powder, and salt.  Stir in the oil; the batter will be very dry.  Mash the bananas in a bowl and add them along with any of the accumulated juices and the chocolate chips to the flour mixture.  Stir to combine.

Fill the muffin papers almost to the top and sprinkle with a generous amount of sanding sugar or Sugar in the Raw.  Bake for 20 minutes rotating the pan once during baking.  Let cool in the pan for 5 - 10 minutes then serve.

Kamis, 30 September 2010

Apple Crumb Bars


Fall is a time for everything apple. The cooler temperatures just beg for a kitchen to be filled with the inviting and delicious aroma apples being baked into mile high apple pies, apple bundt cakes, and cinnamon apple muffins. I hopped on the apple bandwagon over the weekend a baked up an apple filled treat for my family and a few friends of my kids that happen by my kitchen.

While working at a gourmet market about 4 years ago, I was continually developing seasonally recipes for the cookies, bars, cakes, and pies I prepared for our customers. One autumnal treat that was a customer favorite was Apple Crumb Bars. Spiced apples are sandwiched between two buttery oat-filled crumb layers and baked to a golden brown. Served warm topped with vanilla ice cream or alone with a cold glass of milk as an afternoon snack, these cinnamony apple bars are disappear quickly. The Husband has enjoyed the bars with his morning coffee and commented that they are the perfect Fall treat. He was even battling with a friend of My Middle One for the last couple bars on the cake stand.

Add this recipe to your files of treats to bake for your family and friends. They will be thanking you all season long.


Apple Crumb Bars

I like to use Empire or Braeburn apples in these tasty bars.

Makes 9 x 13 inch pan – about 24 bars

2 tablespoons butter
7 cups peeled and sliced apples (about 7 medium sized apples)
¼ cup apple cider or juice
1 tablespoon cornstarch
2 teaspoons cinnamon
½ teaspoon nutmeg
½ teaspoon salt

for crumb layers -
1 ¼ cups flour – I use whole wheat white all purpose flour
½ cup brown sugar
¼ cup sugar
1 ½ cups oats
¼ teaspoon salt
10 tablespoons butter, chilled and cubed

vanilla ice cream – for serving, optional

Preheat oven to 375 degrees. Lightly grease a 9 x 13 inch baking pan and set aside.

In a large sauté pan over medium high heat, melt the butter and add the apples. Stir to coat the apples with the melted butter. Mix the apple cider or juice with the cornstarch, cinnamon, nutmeg, and salt until the cornstarch is dissolved. Stir into the apples and reduce heat to medium. Continue cooking until the apples begin to soften, about 5 – 7 minutes. Set aside.

Meanwhile, in a food processor add the flour, sugars, oats, and salt and pulse 4 – 6 times or until the still has some whole oats in it. Do not pulse until the mixture is fine. Add the butter and pulse until the mixture is crumbly with pieces about the size of marbles.

In the prepared baking pan, add one-half of the crumb mixture and press down. Layer the apples on top and sprinkle the remaining crumb mixture and press down lightly.

Bake for 30 minutes. Increase oven to 425 degrees and continue baking until the top of the bars are golden brown, about another 10 - 15 minutes. Let cool and cut into bars. Serve alone or topped with vanilla ice cream.

Sabtu, 26 Juni 2010

The Perfect Sugar Cookie


Impromptu parties are my favorite kind of party. And when they are held at a friend's home with a beautiful pool and most comfortable outdoor furniture, I am the first to jump at the invitation. With husbands' out-of-town and a hot summer evening, a burger and hot dog barbecue was an ideal opportunity to get together for an evening of swimming and eating.

After a quick morning phone call with the invite from my friend/hostess and talk of the menu for the night, I decided to bring a tortellini salad loaded with red and green peppers, cucumbers, olives, pepperonis, and cheese tortellini and The Perfect Sugar Cookie as my contributions to the festivities. The menu was rounded out with bacon and cheddar burgers, a pile of grilled hotdogs, and still crispy sour cream potato chips - even on a humid night.

The Perfect Sugar Cookie is my "go-to cookie" ever since I made 8 dozen of the buttery, sprinkle laden treats for a middle school event earlier this year. I have deemed this cookie perfect for a number of reasons.

1. 99% of the time I have all the ingredients on hand for the recipe.
2. It takes about 5 minutes to mix up the batter.
3. The cookies are "drop" cookies which means no rolling and cutting out.
4. They are the same size every time - a whopping 3 inches across.
5. The sprinkles cover the whole cookie after they are baked.
6. They are delicious.
7. The cookies come out perfect every time.

One young party guest proclaimed the The Perfect Sugar Cookie as the best cookie he had ever had. The next morning as I was unloading my cooking supplies and groceries for my Thursday personal chef client, I noticed that he even "wrote" a note on my not-so-clean rear window of my car thanking me for the cookies.

That was the best thank you note I have ever received. And even more testament that this is The Perfect Sugar Cookie.

The Perfect Sugar Cookie

adapted from this recipe

makes about 22

2/3 cup shortening
2/3 cup butter, at room temperature
1 1/2 cups sugar
2 eggs
1 teaspoon vanilla extract
3 3/4 cups flour
2 teaspoons baking powder
1 teaspoon salt
jimmies/sprinkles for decoration

Preheat oven to 350 degrees and line 2 baking sheets with parchment paper. Fill a shallow bowl with about 1 cup of the jimmies.

In the bowl of a standing mixer, cream together the butter, shortening and sugar. Beat in the eggs and vanilla. Combine the flour, baking powder and salt in bowl and gradually blend into the creamed mixture until dough comes together, about 2 - 3 minutes.

Use a 2 tablespoon scoop or roll dough into golf ball sized balls. Flatten slightly and dip in jimmies. Place 6 cookies on a baking sheet about 2 inches apart.

Bake cookies 10 to 12 minutes. Only the bottoms should be light brown. Remove cookies from baking sheet and cool on a piece of parchment paper on the counter.

Share/Bookmark

Rabu, 24 Maret 2010

Sugared Shortbread


Cookies are an important time of my day. With coffee for breakfast. As a pick me up in the late afternoon. And a couple with a shot of milk before bed make for a good night's sleep.

I was introduced to Sugared Shortbread by my neighbor and good friend Kathleen. She can brew a pot of coffee and have a tasty baked good ready at a moment's notice. Even if I stop by unannounced. These buttery, dense treats are melt-in-your mouth delicious and include rice flour as an ingredient. Rice flour is available at your local grocery store in the baking aisle or can be bought online. One brand I typically use is Bob's Red Mill White Rice Flour. Or make your own rice flour by grinding white rice in a coffee bean grinder.


If you start a batch of Sugared Shortbread now, it will be ready for when that next cookie attack hits.


Sugared Shortbread

makes 32 cookies

2 cups flour
1/4 cup rice flour such as Bob's Red Mill White Rice Flour *
1/4 cup sugar plus more for sprinkling on top
1 cup butter, melted and cooled

Preheat oven to 350 degrees. Line the bottom of a 8 x 8 inch baking pan with parchment paper. Set aside.

Combine the flour, rice flour and sugar. Stir in the melted butter. Add a little more flour if needed for the dough to be a firm consistency. Press into prepared pan to a thickness of about 1 inch.

Bake for about 40 - 45 minutes or until the shortbread is evenly golden brown. Cut immediately into cookie sticks and sprinkle generously with the extra sugar. Cool completely before removing from pan.

* note - rice flour can be made by grinding white rice in a clean coffee grinder.


Kamis, 03 September 2009

Crunchy and Chewy Chocolate Chip Coconut Cookies


The start of the school year stirs the need in me to bake more cookies. I like the notion of the Donna Reed-type mom who welcomes her children with warm cookies and milk at the end of the school day. I am far from the coiffed and apron wearing 1950s television mom, but I do like to bake up a batch of cookies for my kids.

If my day is not spent cooking 3, 4, 5 or 6 meals for one of my personal chef clients, I am hard at work as a domestic engineer. Not really hard at work, but still doing the cleaning, cooking, bill paying, and grocery shopping just like any other mom. With summer winding down, The Kids are now back to school and we are re-establishing our daily routine. And it no longer resembles the summertime daily schedule of a couple days ago which was really no schedule at all.

Instead of the old standbys of chocolate chip, peanut butter, or oatmeal cookies, I developed a super big, chewy and crunchy cookie. Crunchy and Chewy Chocolate Chip Coconut Cookies are ultra thin, slightly caramel tasting treats that are studded with chocolate. The crunch on the outer edges is coupled with a chewy center for a perfect combination.

Even with the hustle and bustle of life today, it is worth the time and effort to bake a fresh batch of cookies.


Crunchy and Chewy Chocolate Chip Coconut Cookies

makes about 24 (5-inch) cookies

1 cup brown sugar, packed
1 cup sugar
1 cup butter, at room temperature
1 teaspoon vanilla extract
2 eggs
2 and 1/2 cups flour
1 teaspoon baking soda
1 teaspoon salt
1 and 1/2 cups sweetened coconut
1 and 1/2 cups semi sweet chocolate chips
1 cup Rice Krispies cereal

Preheat oven to 350 degrees. Line two large baking sheets with parchment paper. Set aside.

In a large bowl, beat the sugars, butter, vanilla, and eggs with an electric mixer for 4 - 5 minutes or until creamy. Add the flour, baking soda, and salt and mix until combined. Stir in the coconut, chocolate chips, and Rice Krispies.

Using a 2-inch scoop place 6 cookies on each baking sheet. The cookies should be about 3 inches apart because they spread while baking.

Bake for 12 - 13 minutes or until golden brown. Let cool on baking sheets for about 3 - 5 minutes and remove to cooling racks.

Print recipe

Senin, 10 Agustus 2009

Mini Texas Sheet Cakes


Looking for an easy dessert to feed a crowd? My No Thank You Boy proclaimed that a Texas Sheet Cake is the best cake I have ever made. It is quick to make - less than 10 minutes to prep and 20 minutes to cook - and is one of the most moist cakes you will ever taste.

The cake basically frosts itself and looks like a simple iced brownie when it is in the baking sheet. But cut it in 1 and 1/2 inch squares and add a squiggle of frosting and a couple candy stars, and the plain jane chocolate cake transforms into the star of the dessert table.

With a minimal amount of work, you can make a stellar dessert. You will be the star of any event when you bring a platter of Mini Texas Sheet Cakes.


Mini Texas Sheet Cakes

makes about 8 dozen

for the cake-
1 cup of butter
1/3 cup cocoa
1 cup water
2 cups sugar
2 cups flour
1 teaspoon baking soda
1/2 teaspoon salt
1/2 cup buttermilk
2 eggs, beaten
1 teaspoon vanilla extract

for frosting-
1/2 cup butter
1/4 cup cocoa
6 tablespoons milk
1 teaspoon vanilla extract
1 pound powdered sugar

Tube of white icing from craft store or grocery store
Candy stars or sprinkles

Preheat oven to 400 degrees. Grease an 18 x 12 inch baking sheet and set aside.

In a small saucepan over medium heat add the butter, cocoa, and water and cook until it just comes to a boil. Remove from heat.

In a large bowl, combine the sugar, flour, baking soda, and salt. Pour cocoa mixture over the flour mixture and mix thoroughly. Add the buttermilk, eggs, and vanilla extract and mix until combined. Pour batter into prepared pan and spread it evenly out. Bake for about 18 - 20 minutes or until the cake bounces bake when lightly touched. Remove cake from oven.

While the cake is baking, prepare the frosting. In a small saucepan over medium heat, add the butter, cocoa, and milk. Bring the mixture to a boil and then remove from heat. Whisk in the vanilla extract and powdered sugar until smooth. When the cake comes out of the oven, immediately pour the frosting over the top and spread it out evenly. Let cool and then refrigerate for 1 hour.

Remove the cake from the refrigerator and cut into 1 and 1/2 inch squares. Top with a squiggle of frosting and decorate with candy stars or sprinkles. Refrigerate until ready to serve.

Rabu, 08 Juli 2009

An Elfwich Kind of Cookie

An Elfwich Kind of Cookie

While I was growing up, I was lucky to have a mom who baked homemade pound cakes, chocolate chip cookies, blueberry bars, and apple slices. Upon coming home from school, I would switch on the television to an episode of Gilligan's Island and munch on freshly baked cookies with a cold glass of milk. I thought this was how every kid spent their time after school.

Then I got invited over to the neighbor's house to play with the little girl who was my age. She asked if I wanted a snack and of course I did. She opened the pantry, and I could not believe my eyes. It was stocked with barbecue potato chips, Cheetos, french onion potato chips, Pringles, Coke, Pepsi, pretzels, and Oreos. Every junk food imaginable filled the six foot wide pantry.

At my house, my Dad did the grocery shopping every 2 weeks. He would buy 1 box of Jays Potato Chips, an 8 bottle pack of Coke, and a box of Nabisco Nilla Wafers. When our "stash" of junk food was devoured by the six kids in my family, we would have to wait another 2 weeks until it was restocked. Of course we had my Mom's strawberry pie or creamy rice pudding. I did not know how good I had it at my home because I was blinded by the "Pantry of Junk Food" at my friend's house.

I have adopted my Mom's need to bake, and there is rarely a day when we do not have Biggie Chocoholic Cookies, Dark Chocolate Butterscotch Bars, or a Blueberry Crostada on the counter. My kids do love the homemade baked goods but, are forever grateful when I infrequently pick up a package of Toaster Strudel or Nutter Butter cookies. There is some guilt thing that kicks in when I reach for a packaged bake good. My conscious always tells me that I should make it myself.

One treat that I would occasionally manage to sneak into my Dad's shopping cart would be a package of Keebler E.L. Fudge cookies. I loved the buttery cookies that sandwiched the chocolate fudge filling. With the help of a recipe from Martha Stewart's Cookies cookbook, I made my own version of the Elf-like cookie. It takes more time to make these melt-in-your mouth delights then just picking them up at the grocery store, but they are well worth effort.

The only problem with making this cookie is that it takes two cookies to make one sandwich cookie. Next time I will make a double batch.


An Elfwich Kind of Cookie

adapted from the recipe for Rosemary Butter Cookies in Martha Stewart's Cookies

Makes about 2 dozen sandwich cookies
1 cup (2 sticks) salted butter, at room temperature
3/4 cup sugar
1 egg
2 teaspoons vanilla extract
2 1/2 cups flour
1 teaspoon cinnamon
1 teaspoon salt

for the fudge filling -
3 tablespoons butter
2 tablespoons cocoa
3 tablespoons milk
2 cups confectioner's sugar
1/2 teaspoon vanilla

Put butter and sugar in the bowl of a standing mixer. Beat on medium speed until pale and light and fluffy, about 2 minutes. Mix in egg and vanilla. Reduce mixer speed to low and gradually add flour, cinnamon, and salt. Mix until combined.

Divide the dough in halve and form into a rectangular shaped log about 3 inches by 1 1/2 inches. Roll in parchment paper and chill in refrigerator for about 2 hours.

Preheat oven to 350 degrees. Line a baking sheet with parchment paper and set aside. remove the cookie logs from the refrigerator and remove parchment paper. Cut into 1/4 inch slices and place about 1 inch apart on the baking sheet. Bake until the edges are slightly golden brown, about 12 - 14 minutes. Remove from sheets and cool on wire racks.

To make fudge filling, in a small saucepan combine the butter, cocoa, and milk and bring to a boil. Remove from heat and whisk in confectioner's sugar and vanilla extract until smooth. Put filling in a bowl and cool to room temperature. Then refrigerate for about 2 hours.

To assemble cookies, remove the filling from the refrigerator and stir. If it is too stiff to spread on the cookies, let it sit out for a few minutes, stirring occasionally. When filling is spreadable, place a rounded teaspoonful on one of the cookies and top with another cookie forming a sandwich. Continue spreading the filling on the rest of the cookies until all the sandwich cookies are made.

Store in the refrigerator in an airtight container for 3 - 4 days.
Selasa, 02 Juni 2009

Biggie Chocoholic Cookies


When I get a new cookbook, I read it like it is a novel. I devour every recipe, photo, and cooking tidbit offered by the author. Every once in a while, it is time to branch out and actually read a novel. The novels that I pick are about food and usually include recipes. Some of my favorite foodie reads include A Year in Provence, Comfort Me with Apples: More Adventures at the Table, and Comfort Food.

One of the first fiction foodie authors I discovered was Diane Mott Davidson and her series of mysteries about a caterer named Goldy Schultz. I loved reading the descriptions of the food the heroine prepared and the lavish parties she catered. The novels are interspersed with numerous recipes and a favorite of mine appeared in Davidson's novel The Main Corpse.


Chocoholic Cookies are double chocolate cookies loaded with chocolate chips and oatmeal. I have made a few changes over the years and have come up with a family favorite cookie. Nothing is better than a good book and a great cookie.

Biggie Chocoholic Cookies
adapted from a recipe in Diane Mott Davidson's mystery novel The Main Corpse.

makes about 24 - 3 inch cookies

1 cup (2 sticks) butter, softened
1 cup brown sugar, packed
1/2 cup sugar
2 cups flour
1 teaspoon baking soda
1 teaspoon salt
5 tablespoons unsweetened cocoa
2 eggs
2 teaspoons vanilla extract
2 1/2 cups rolled oats
2 cups semi sweet chocolate chips
1 cup Hersey's Bits O' Brickle Toffee Bits

Preheat oven to 350 degrees. Line two large baking sheets with parchment paper. Set aside.

In a large bowl, beat together butter and sugars until creamy. Add flour, baking soda, salt, and cocoa mixing until thoroughly combined. The batter will be stiff. Add eggs one at a time, mixing after each one. Add vanilla extract and mix well. Add oats, chocolate chips and toffee bits and mix until combined.

Using a 2-inch scoop, drop batter about 2 inches apart on cookie sheet. Bake for 11 - 12 minutes. The cookies will still be slightly soft in the middle. Let cool on pan for 2 minutes then remove to wire racks to cool completely.

Enjoy with your favorite book.

Senin, 13 April 2009

A cupcake to share

Pound Cake Cupcakes
Writing a food blog is a learning experience. I have learned many aspects about myself, my family, my friends, my online foodie friends, and my cooking. I started writing my blog for myself as a way to keep track of my recipes that I make for my family. Along this journey, I have amassed more than 200 recipes and continue to learn about myself each day.

I have discovered that if you make good food in an inviting atmosphere, they will come. People love food. People love good food. The food should be good food, not expensive and stuffy food. People are most comfortable eating a sweet and spicy pulled pork sandwich on the tailgate of your car or sitting around the picnic table with a pot of steamed clams, mussels, kielbasa, along with sourdough bread. They want to roll up their sleeves, dig in and enjoy the food, the drink and the company. Ask your guests what you served them the last time they came over, and they will most likely not remember. Not that your food wasn't good, but this is not in the forefront of their minds. They will not remember if you spent 2 days preparing the meal, and they don't want you to spend so much time preparing the food. What will remain in their memory will be whether they had a good time at you table. Did they laugh? Did they feel welcome and comfortable? People like a warm and welcoming gathering and having good, uncomplicated food is the icing on the cake.

I have discovered that there are many different types of cooks in the world. Some are fancy, smancy with a little bit of a snooty air about them. They take their title of "Chef" very seriously. Others love to bake albeit cupcakes, muffins, cakes, cookies, or brownies. Their baked goods are works of art. Some are intimated by cooking and need a nudge to try a new food or recipe. Some love to grill and barbecue. Some have found comfort in making casseroles. Some tinker with recipes and never make the same dish twice. I discovered that foodies are very friendly. Food brings people together. And when it comes right down to it, it is just food. Making food should be fun and not a chore. It isn't rocket science. Sure there are some aspects of cooking that are more difficult than others. But, it is about making good food and sharing with people that you love. That should be the most rewarding aspect of cooking.

I have discovered that no matter how unique and earth-shattering I think my most recent post is, someone has probably already made, tasted, photographed, and published my latest and greatest creation. With thousands of food blogs on the Internet, bloggers are blogging about the same recipes and cooking techniques that I am. Undoubtedly, food is a very important part of our lives. With my blog, I try not to just retype published recipes. Hopefully by following my posts, readers will try a few new recipes or learn a new cooking technique. By using fresh ingredients with simple techniques, cooking will be a joy.

Sharing food is central to my love of cooking. I offer you a recipe for Pound Cake Cupcakes. This is one of my good recipes. A basic dense, buttery cupcake. Bake a batch and share them with your family, friends, neighbors, co-workers, teachers, the garbage men, or just about anyone you with which you come in contact. The world a better place if we all just shared a cupcake once in a while.

Cupcakes to share

Pound Cake Cupcakes

makes about 24
2 1/4 cups flour
1 1/2 teaspoons baking soda
1/2 teaspoon salt
2 cups sugar
4 extra large eggs
2 teaspoons vanilla extract
3 sticks of butter, melted

Preheat oven to 350 degrees. Line 2 cupcake pans with foil cupcake liners. Set aside.

In a bowl, combine the flour, baking soda, and salt. Set aside.

In a bowl of a standing mixer, combine the sugar, eggs, and vanilla. Blend for about 4 - 5 minutes or until thoroughly combined. With the mixer on low, drizzle in the melted butter and continue mixing until combined, about 2 - 3 minutes. Add the flour mixture in 2 additions. Blend until just combined.

Fill each of the cupcake papers about 2/3 full with the batter. Bake for about 18 - 20 minutes until a toothpick comes out clean. Let cool for 5 minutes in the pan then remove and cool on a baking rack.

Rabu, 01 April 2009

French Silk Pie


Pie is very high on my list of Favorite Things. And French Silk Pie is the number one pie on that list.

While I was growing up, my older sister would take me to Bakers Square Restaurant for pie. When you walked in the door, a large glass case was filled with the most glorious pies. Caramel Apple Pie, Fruitabulous Blueberry Pie, Caramel Pecan Silk Supreme Pie, Chocolate Peanut Butter Cup Pie, Fresh Strawberry Cream Cheese Pie, and the pie of my dreams, French Silk Pie. This award winning pie is a chocolate lovers dream. Velvety smooth chocolate silk is topped with fluffy whipped cream and milk chocolate shavings.

I no longer live near a Bakers Square Restaurant so I make my own version of the ultra chocolaty and sinfully rich dessert. A large dollop of fresh whipped cream catapults this pie to the highest heights of piedom. It is so loved by No Thank You Boy that he composed a poem about French Silk Pie.

PIE
by
No Thank You Boy
Pie is a wonderful thing. Pie is a really cool thing. There are so many to pick from like apple, pumpkin or maybe even French Silk. I wish I were a PIE.


No need to say more. Make a French Silk Pie today.


French Silk Pie

adapted from Better Homes and Garden New Cookbook, 1981, Ringbound

1 cup sugar
3/4 cup butter
1/2 cup plus 1 tablespoon cocoa powder
3 tablespoons canola oil
1 teaspoon vanilla extract
3 eggs
1 (9-inch) baked pie shell, cooled
Whipped cream

In a bowl, beat the sugar and butter with an electric mixer on medium speed until fluffy, about 4 - 5 minutes. Beat in the chocolate, canola oil, and vanilla. Add eggs, one at a time, beating well after each addition and scraping the sides of bowl as needed. Spoon chocolate mixture into pie shell and chill for at least 3 hours. Top with whipped cream.

Notes: 3 (1-ounce) squares of unsweetened chocolate, melted and cooled, can be substituted for the cocoa powder and the canola oil.

Print recipe


Sabtu, 14 Maret 2009

Dark Chocolate Chip Butterscotch Bars


Dark Chocolate Butterscotch Bars
All is right in the world when there are homemade cookies and milk. If those cookies include chocolate, have barely undercooked centers, and the edges are slightly crispy, you are reaching snack time nirvana.

Dark Chocolate Butterscotch Bars meet all of my perfect cookie requirements. The bars cut from the middle of the pan stay chewy while the ones around the edge of the pan have a buttery, crunchy crust. The only problem with these treats is that they disappear too quickly.


Dark Chocolate Butterscotch Bars
1 cup (2 sticks) butter, softened
1 3/4 cups brown sugar, packed
1 tablespoon vanilla extract
2 eggs
2 1/2 cups flour
1 teaspoon baking powder
1 teaspoon salt
2 cups dark chocolate chips, divided
Preheat oven to 350 degrees. Line a 9 x 13 inch baking pan with parchment paper. Set aside.

Beat butter, brown sugar, and vanilla extract in a large bowl until creamy. Combine flour, baking powder, and salt. Beat in eggs. Gradually beat flour mixture into butter mixture. Stir in 1 cup of the chocolate chips. Spread into prepared pan and sprinkle remaining chocolate chips on top.

Bake for 30 - 35 minutes or until a toothpick inserted in the center comes out clean. Cool in pan. Invert pan on a cutting board, remove parchment and cut into bars.

Jumat, 13 Februari 2009

Pardon the Interruption


I have just decided on our Valentine's Day menu for tomorrow, and I'm preparing to hit the grocery store before it is besieged with shoppers loading up on shrimp cocktails, lobster tails, and chocolate dipped strawberries. I always debate on whether I want to go to a restaurant for dinner or stay at home and cook for myself and family. Cooking at home usually wins out.

When you have 3 Kids, Valentine's Day turns into a group event. The Husband and I have been married for 18 years; we have old love. I remember our first few Valentine's Days together. Red roses, heart shaped boxes of candy, dinners out on the town. Those are still all good things.

Then our family started to grow. During my early motherhood days, I would cut giant hearts out of red and pink construction paper for my Kids Valentine's Day cards. That tradition has fallen by the wayside. This year I made big sugar cookies dipped in chocolate and piled with jimmies and sprinkles for the Kids to share with their lunch tables. With 2 middle schoolers and a high schooler, there are no longer any Valentine's Day class parties to bake for. No Thank You Boy asked why I was making cookies for him to share with his friends because no other mom does anything like that. I said it is just what I do. Some people must exercise or keep their homes immaculately clean or have a fulfilling job to be happy. I, on the other hand, NEED to bake a pound cake, chocolate chip cookies or brownies to have a satisfying day. There is just something about mixing up butter and sugar in my Kitchen Aid mixer that makes me happy. If my cake stand is empty, it is not a good day. Today it is filled with chow mein noodle haysacks. It's a good day.


Haystacks

2 cups semi sweet chocolate chips
3/4 cup peanut butter
4 - 5 cups chow mein noodles
sprinkles

Melt chocolate chips and peanut butter in a heat proof bowl over simmering water. Add chow mein noodles and stir. The noodles should be coated thoroughly. Drop by tablespoonfuls onto parchment paper and sprinkle with sprinkles. Let harden.

Tomorrow evening, The Husband has said he wants us to prepare dinner together. He is your basic Grill Man during the summer months so cooking dinner together will be a somewhat new experience. Our menu will consist of Seared Beef Tenderloin with Mushroom Au Jus, Fettuccine Alfredo, Roasted Asparagus, and Creme Brulee and Chocolate Mousse. Yes, we will be having 2 desserts. I love them both. There will be some wine and champagne too I imagine. I am expecting a few interruptions as My Oldest goes off to the movies with friends or My Middle One needs a ride to her BFF's house for a sleepover or No Thank You Boy heads to the neighbor's to play Wii.

Interruptions are the norm in our lives at this time. I have been thinking about the day when The Husband and I will no longer spend Friday nights watching No Thank You Boy play lacrosse, or pack a day's worth of food for a softball tournament early on a Sunday morning, or make countless trips to the movie theater, mall, and friends' houses all over town. Our lives will be more quiet then. But on the other hand, I'm sure we will find some interesting adventures to fill our days. I think we will get away on one of those adventures this weekend.

Happy Valentine's Day!


Minggu, 01 Februari 2009

Chocolate Buttermilk Pound Cake


Pound cake is an old fashioned dessert with recipes handed down from mothers, grandmothers, great aunts, and great grandmothers. A dense, butter-laden cake with a golden brown crust that stays moist and fresh on your counter for days, if it lasts that long. We finish our family favorite pound cake from my Great Aunt Rose's recipe in about 24 hours.

The pound cake acquired its name because the original recipes used a pound of butter, a pound of flour, and a pound of sugar, and a pound of eggs. There have been many variations made to the traditional recipe, and it is still one of the most beloved cakes around. My Chocolate Buttermilk Pound Cake is a rich chocolate version of pound cake that is perfect with a cup of coffee or tea. This not-too-sweet cake can be served with ice cream, whipped cream, a dusting of powdered sugar, or just plain.


Slice off a few wedges and hide them in the freezer. No one will be the wiser.

Chocolate Buttermilk Pound Cake


makes 1 cake, serves 10 - 12

3 cups of flour
1/2 cup unsweetened cocoa powder
2 teaspoons baking powder
1/2 teaspoon salt
3 sticks of butter, softened
3 cups of sugar
5 extra large eggs, at room temperature
2/3 cup buttermilk
1/3 cup strong coffee, cooled
2 tablespoons vanilla extract
powdered sugar, for dusting

Preheat oven to 350 degrees. Grease and flour a 10-inch tube pan. Set aside.

Combine flour, cocoa powder, baking powder, and salt in a bowl. Set aside.

With a standing mixer (it is the best to use this type of mixer for this stiff batter) or an electric hand mixer, cream butter and sugar until creamy. Add eggs one at a time and beat well after each addition.

In a small bowl, combine buttermilk, coffee, and vanilla extract. Add flour and buttermilk mixtures alternately to the butter mixture, beginning and ending with the flour mixture. Scrape down the bowl several times. Mix until just smooth and do not over beat the batter.

Spread the batter into the prepared pan and bake for 1 to 1 and 1/4 hours or until a toothpick inserted in the cake comes out clean.

Let cool in pan for about 15 minutes. Run a knife around the edges to loosen then invert on a cooling rack. Dust with powdered sugar, if desired.


Kamis, 22 Januari 2009

Rice Krispie Biscotti


The clock strikes 3:30 p.m. It is that time of day again. Those kids will be running through the door at any minute. And they will be starving. And they will ask,

"What's to eat?"

"What's to eat?"

Rice Krispie Biscotti!

In the time it takes to run a load of laundry, you can make these treats for your dear little ones. Don't forget to set a few aside for yourself.

Rice Krispie Biscotti


makes about 20 - 22

3 tablespoons butter
40 large marshmallows - 1 (10 ounce) bag
6 cups Rice Krispies
1 1/2 cups semi sweet chocolate chips
5 - 6 tablespoon half and half
sprinkles

Melt butter in a large pot over medium heat. Add marshmallows and stir to melt. Take pot off heat and stir in Rice Krispies. Let cool until it can be handled without burning your hands.

Scoop out about 1/3 cup of the Rice Krispie mixture and form into a biscotti shape - a thin log shape. Place on a piece of parchment paper to cool. Continue with the remaining Rice Krispie mixture until all biscotti are formed. Let cool completely.

Melt chocolate chips with the half and half in a heat proof bowl over simmering water and stirring occasionally. Dip half of each biscotti in melted chocolate and sprinkle with sprinkles. Place on parchment paper to harden. Store in airtight container.