Jumat, 25 Mei 2012

I Don't Want to Lose You

My desk
Nothing in life ever seems easy.  And for me, my computer is a magically and mystically beast.  At the speed of light, it does more for my food writing and personal chef business than I could ever do with telephones, faxes, and the good ole' US mail.  But along with the magic it performs comes the mystery of not knowing what is going to happen if I press a certain key or click a link.  I guess I should have paid more attention in my Computer Science 101 class and not had the guy sitting next to me write my programs.


So to all you loyal Feedburner subscribers, I am in the process of redirecting you to my new website amycaseycooks so you don't miss out on my recipes, cooking videos, and articles.  The feed to Dinners for a Year will be deleted and redirected to my new website.


Hopefully all will run smoothly and update your reader or prompt you to update to my new feed.


I am crossing my fingers and toes and saying the rosary a few times that it will work.


Stay tuned.......

Rabu, 25 April 2012

amycaseycooks


Alert the media!!!

I am excited to announce my new website www.amycaseycooks.com.  The site is a combination of my blog Dinners for a Year and Beyond and my personal chef services website.  All new blog posts will be on my new website so sign up for my newsletter to receive updates.

To keep up with what is cooking in my kitchen, check out my cooking videos, read my articles, and see what my personal chef services are all about stop by www.amycaseycooks.com.

You can also follow me on Facebook and Twitter.

Sabtu, 14 April 2012

Grilled Balsamic Glazed Mahi Mahi

Grilled Balsamic Glazed Mahi Mahi

With a few warm days interspersed with to cooler Spring weather, I decided it was time to venture outdoors and fire up the grill.  I am lucky to have a family of fish lovers and with mahi mahi on sale, last night was the night to introduce them to this firm, white fish. Grilled Balsamic Mahi Mahi is a super simple recipe that lends itself well to many different types of fish such as salmon, tuna, and halibut.

With the grill fired up, dinner was on the table in less than 15 minutes. I also served basmati rice and fruit salad. We all enjoyed the dinner. My Middle One did comment that mahi mahi was not her favorite type of fish. She is more of a salmon fan. The slightly caramelized balsamic vinegar glaze added just enough flavor to the fish without overpowering its delicate flavor. I grilled some extra fish which will be fish tacos for tomorrow's lunch.

If you are trying to serve more fish to your family, this is a good starter recipe to try. With fresh fish and a quick preparation, you can change those landlubbers into seafaring folks.


Grilled Balsamic Glazed Mahi Mahi

serves 4

1 1/2 pounds of mahi mahi fillets
1/3 cup olive oil
3 tablespoons balsamic vinegar
2 teaspoons Dijon mustard
1 teaspoon honey
1/2 teaspoon salt
1/4 teaspoon pepper
1 medium tomato, diced
basil, chopped

Preheat grill and set it to medium high heat.

In a small bowl whisk together olive oil, balsamic vinegar, Dijon mustard, honey, salt and pepper.  Place the fish in a glass baking dish and drizzle with half the marinade.

Grill the fish for about 5 minutes. Flip the fish and brush with some of the reserved marinade. Grill for an additional 4 - 6 minutes and flip the fish one more time. Brush with more of the balsamic vinegar and remove to a platter. Top with the chopped tomato and the basil. Serve immediately.

Selasa, 10 April 2012

Burgers with Fresh Tomato Relish

Burgers with Fresh Tomato Relish

I love a good burger.  Nothing fancy, just a good burger.  My favorite recipe comes from this cookbook of all places.  It was a gift from The Husband about 15 years ago, and I keep going back to the same burger recipe time and time again.

My usual burger toppings include American cheese, ketchup, mayonnaise, and a little pickle relish.  But I decided to whirl up a batch of fresh tomato relish in my food processor to change up tonight's dinner.  A chunky blend of grape tomatoes and onions is combined with vinegar, honey and a few pantry seasoning staples.  This sweet-tart and savory topping would also be ideal for a turkey sandwich or scrambled eggs.

With some recipes, you don't mess with perfection.  Keep it simple.

Burgers with Fresh Tomato Relish

makes 4 burgers
for fresh tomato relish --
1 pint grape tomatoes
1/2 cup onion, chopped
1 tablespoon apple cider vinegar
2 teaspoons honey
1/4 teaspoon salt
1/8 teaspoon pepper
1/4 teaspoon celery salt

for burgers --
2 slices bread
about 1/4 cup milk
1 pound ground beef ( I use organic ground beef)
1 egg, beaten
1/2 cup onion, finely chopped
1/2 teaspoon salt
1/2 teaspoon pepper

4 buns

Heat grill to medium high heat.

For the fresh tomato relish, place ingredients in the bowl of a food processor and pulse 10 - 12 times or until the tomatoes and onions are finely chopped but still chunky.  Set aside.

For the burgers, place the bread in a bowl and pour milk over it. After the bread has soaked up as much of the milk as possible, squeeze out the excess. Combine the soaked bread and the remaining burger ingredients in a large bowl. Form into 4 burgers.

Grill burgers about 3 - 4 minutes per side for medium rare or a little longer if you like your burgers more well done.  Serve on buns with a generous spoonful of the tomato relish.

Senin, 09 April 2012

Honey Ham and Fresh Pineapple Pizza

Honey Ham and Fresh Pineapple Pizza
Your Easter dinner was a success!

The guests ate and drank and ate and drank their fill of mimosas, honey glazed ham, twice baked cheesy potatoes, pineapple bread pudding, roasted asparagus, french silk pie and more peanut butter filled chocolate eggs than you can count.

Some of the leftover ham was sent home with your relatives, but there is still 3 pounds of the spiral cut beauty sitting in your refrigerator.  After ham sandwiches, omelets filled with ham, and split pea soup with ham, what will you make with all that ham?

Honey Ham and Fresh Pineapple Pizza is what will be for dinner tonight.  Flour tortillas stand in for the crust and are topped with a spicy marinara sauce, monterey jack cheese, diced ham and pineapple and a sprinkling of herbs.  A few minutes in the oven is all that is need to melt the cheese and crisp up the crust.

Your family will never know you are serving "leftover ham," and there is no need to tell them ;)


Honey Ham and Fresh Pineapple Pizza

serves 4

4 (9-inch) flour tortillas
1/2 cup marinara sauce
2 tablespoons barbecue sauce
1 1/3 cups shredded monterey jack cheese
1 cup diced ham
1 cup diced fresh pineapple
dried oregano
dried basil
chopped fresh parsley

Preheat oven to 450 degrees.

Place tortillas on 2 large baking sheets.  Combine the marinara and barbecue sauces and spread about 2 heaping tablespoons on top of each tortilla.  Sprinkle 1/3 cup of the cheese on top of the sauce followed by 1/4 cup each of the ham and the pineapple.  Sprinkle with a little oregano and basil.

Bake in oven for 6 - 8 minutes or until the cheese is melted and slightly golden brown and the tortillas are crispy.  Let cool 2 - 3 minutes before cutting in pieces and sprinkle with the parsley.

Senin, 02 April 2012

Lemon Barbecued Shrimp

Lemon Barbecued Shrimp
With a spell of warm Spring weather over the past couple weeks, I dusted off the Weber grill and made a few dinners in the great outdoors.  First up was a platter of Lemon Barbecued Shrimp.  I love grilling because...

1.  I spend time outside
2.  Dinner cooks by itself with little help from me
3. No dirty pots and pans to wash

Lemon Barbecued Shrimp includes a homemade marinade with ingredients most kitchens have on hand.  Making your own marinades is a quick proposition.  With a mason jar, you can add all the ingredients and give it a vigorous shake.  Also, you control the ingredients that go in so you can make your homemade marinade as healthy - or not - as you would like.

After spending about 30 minutes in the marinade, the shrimp get a a double flavor boost from the tangy lemon barbecue sauce and the char or the grill.  Head outside and prepare this is a quick meal for your family.  And you will get the added benefit of getting a dose of vitamin D from some time spent in the sun.

Lemon Barbecued Shrimp

serves 4

for the mariande --
1/4 cup ketchup
3 scallions, thinly sliced
3 tablespoons lemon juice
1 tablespoon honey
1 tablespoon apple cider vinegar
1 tablespoon Worcestershire sauce
1 teaspoon sesame seeds
1/4 teaspoon allspice
1/2 teaspoon salt
1/2 teaspoon pepper

2 pounds extra large shrimp (16 - 20 count per pound), peeled and deveined with tails
12 inch wooden skewers

lemon wedges

In a mason jar with a lid, combine the marinade ingredients and shake well.  Place shrimp in a resealable bag and add about 2/3 of the marinade.  Place in refrigerator to marinate for about 30 minutes.

Heat grill to medium high.  While the grill is preheating, thread 4 shrimp on each skewer.  Grill for 3 - 4 minutes per side, brushing with remaining marinade during the last couple minutes.  Can be served straight from the grill or chilled with lemon wedges.

Minggu, 25 Maret 2012

Granola Cookie

Granola Cookie

No added sugar.  Just oats, almond meal, cranberries, bananas, almonds, coconut, coconut oil, cinnamon, and a pinch of salt. 

These grab-and- go Granola Cookies are perfect for breakfast, an after school snack, or that little something sweet anytime of the day.  A dense cookie loaded with all your favorite ingredients in granola, it that fills you up so can make it through that mid afternoon slump.  I like to package them in clear cellophane treat bags that are available at most craft stores like Michael's and AC Moore or online from Amazon.  That way they are quick to snatch as you head out the door to tackle your day.


Make a double batch because they freeze well, and you will have plenty on hand for the next couple weeks.

Granola Cookies

makes 12 large cookies

1 1/2 cups rolled oats (I used Bob's Red Mill Gluten Free Rolled Oats)*
1/4 cup almond meal/flour (I used Bob's Red Mill Almond Meal/Flour)*
1 cup unsweetened coconut flakes *
1/2 cup slivered almonds
1 cup unsweetened dried cranberries
1/2 teaspoon salt
1 teaspoon cinnamon
3 very ripe bananas
1/4 cup coconut oil (can substitute grapeseed, peanut oil, or extra virgin olive oil)

* the oats, almond meal/flour and unsweetened coconut are available in the baking aisle of well stocked grocery stores.

Preheat oven to 350 degrees.  Line a large baking sheet with parchment paper and set aside.

In a large bowl, combine oats, almond meal/flour, coconut flakes, almonds, cranberries, salt, and cinnamon.

In a small bowl, mash the bananas and stir in the coconut oil.  Add to the oat mixture and stir to combine.

Using a large cookie scoop, portion batter into 12 cookies.  Using wet hands, form the dough into a cookie shape and place about 2 inches apart on the baking sheet.  Bake for 20 - 25 minutes until set and golden brown on the bottom.  Remove to a cooling rack and completely cool.  Package individually in plastic wrap or clear cellophane treat bags.  Will stay fresh up to 1 week at room temperature or can be frozen for up to 3 months.

Packaged and ready to grab-and-go

Kamis, 22 Maret 2012

Carrot Ginger Dressing

Carrot Ginger Dressing
A night out at your local Japanese restaurant will undoubtedly include a salad with crispy iceberg lettuce, shredded carrots, tomato wedges, and cucumber slices topped with a large dollop of Carrot Ginger Dressing.  This zippy dressing tastes like no other with its bite from the ginger root, saltiness of the miso, and bright orange color and fresh taste from the carrots.  It is packed with flavor and is light and refreshing.

I have been making more and more salad dressings recently as the long list of ingredients on the store bought brands scares me.  I am not sure what Polysorbate 60 is and I definitely don't need Yellow #5 food coloring in my salad dressing.  Most homemade dressings contain only a few ingredients that the well stocked kitchen typically has on hand.  And many are combined in a mason jar or whirled in the blender or food processor which makes prep a breeze.

Carrot Ginger Dressing took all of 5 minutes to make in my food processor and that included the assembling and putting away the ingredients.  The recipe makes about 1 cup of dressing allowing enough for a few salads during the week.

Once you taste your homemade Carrot Ginger Dressing you will want to make all your salad dressings from scratch.  This could be the start of something beautiful.


Carrot Ginger Dressing

makes 1 cup

1 tablespoon grapeseed or peanut oil (or substitute a neutral tasting oil you have on hand)
2 teaspoons sesame oil
1/4 cup rice vinegar
1 tablespoon honey
3 tablespoons white miso*
1 inch piece of fresh ginger root, peeled and chopped
4 carrots, peeled and cut in large chunks
3 tablespoons water

Combine the ingredients in the bowl of a food processor and pulse until well combined but still with small bits of carrot.

Dressing can be kept in a covered container in the refrigerator for up to 1 week.

*Miso is available in most well-stocked grocery stores.  It keeps in the refrigerator for several months or in the freezer indefinately.

Senin, 19 Maret 2012

Thyme Rubbed Pork Chops with Apple-Shallot Sauce

Thyme Pork Chops with Apple-Onion Sauce
If you grew up in the 1970s, The Brady Bunch was required television viewing.  It is the story of a lovely lady bringing up 3 very lovely girls who meets a man named Brady who was bringing up 3 boys of his own.  They knew that this group would some how form a family and that is how they became the Brady Bunch.  I have seen every episode at least 3 or 4 times and have a few favorites:  the multi part episode when the Brady's vacation in the Grand Canyon and Bobby and Cindy smuggle beans and franks in empty flashlights for the Indian boy Jimmy, the suspenseful episode when Marcia breaks her nose and has dates with 2 different boys on the same night, and the musical episode when the Brady kids compete as "The Silver Platters"  in a television talent show.  Oh the memories........

One classic Brady Bunch episode that particularly stands out for me is the "Pork Chops and Applesauce" episode.  Peter is testing out new personalities and does his best Humphrey Bogart impersonation while discussing dinner with Alice the housekeeper and his mom Carol.


Putting an updated twist on the classic Brady Bunch pork chops and applesauce recipe, I developed Thyme Rubbed Pork Chops with Apple-Shallot Sauce.  Apples are one fruit which we always seem to have on hand at our house. Both crisp, tart Granny Smith and sweet and slightly soft Macintosh apples are two favorites that are readily available in the refrigerator fruit drawer.  Pan sauteed pork chops are topped with a chunky apple and shallot sauce that gets a kick from Dijon mustard and Garam Masala (an Indian spice blend readily available at your local grocery store).  A simple dish to prepare that packs a complex flavor wallop.

Sit down to a family dinner of Thyme Rubbed Pork Chops with Apple-Shallot Sauce and then watch an episode or two of the The Brady Bunch.  You will fall in love with the vintage show all over again.

Thyme Rubbed Pork Chops with Apple-Shallot Sauce

serves 4

4 (6 - ounce) pork chops, center cut and about 1-inch thick each
1 tablespoon fresh thyme
salt and pepper
2 teaspoons olive oil

1 large apple, such as Braeburn or Rome, peeled, and chopped in large dice
2 shallots, sliced thin
1 garlic clove, chopped
1/2 cup chicken stock
1/4 cup white wine
2 teaspoons honey
2 teaspoons Dijon mustard
1/2 teaspoon Garam Masala

Sprinkle pork chops with thyme, salt and pepper.  Heat a saute pan over medium high heat and add oil.  Add pork and saute on each side for about 4 - 5 minutes or until just cooked through.  Transfer to a plate and tent with foil to keep warm.

In the same pan, add the apple, shallot, and garlic.  Saute, stirring occasionally, for 3 - 5 minutes or until the apples begin to just soften and the shallots are translucent.  Stir in chicken stock, wine, honey, mustard, and Garam Masala.  Continue cooking for an additional 3 - 5 minutes or until the sauce is slightly thickened.  Season to taste with salt and pepper.

To serve, top pork chops with apple-shallot sauce.

Jumat, 09 Maret 2012

Crumb Cake Muffins

Crumb Cake Muffin
New Jerseyans have a crazy love affair with crumb cake.  It is sold in every bakery, diner, and bagel shop across the state.  From north to south and east to west, New Jersey is overflowing with crumb cake and Jerseyites never seem to tire of eating it.  There are even heated discussions over steaming cups of coffee and huge pieces of crumb cake in the local diners as to which part is the most cherished and desirable - the cake or the crumb.

It can be a messy proposition to eat a piece of crumb cake.  All that crumb is crumby.  I am surely not complaining, but sometimes I like to take my treat on the road.  I decided it was time to develop a handheld version of this popular bakery treat.  It would need to be easily portable for a quick breakfast while heading out the door and sturdy enough to be packed in a lunch bag and still make it to school with crumb intact.  After some trial and error and lots of taste testing, the perfect Crumb Cake Muffins were born.  And my No Thank You Boy deemed them "the best muffin.....ever."  With a dense, moist cake-like muffin base and a heaping layer of crumb that both sinks slightly and graces the top of the muffin, the portable baked good does not disappoint.

Make a batch of Crumb Cake Muffins this weekend and decide for yourself which part of the muffin you like the best - the crumb or the cake.  It is a tough decision, but it will be tasty trying to decide.

Crumb Cake Muffins

makes 15 muffins

for the crumb topping--

2 tablespoons sugar
1/3 cup brown sugar, packed
1/2 teaspoon cinnamon
1 2/3 cups cake flour *
1 sticks butter, melted


for the muffins--

2/3 cup half and half
1 tablespoon vinegar
2 1/2 cups cake flour *
1 cup sugar
1/2 teaspoon salt
1/2 teaspoon baking soda
1 1/2 sticks butter, cut in chunks
2 extra large eggs
2 teaspoons vanilla

Preheat oven to 350 degrees.  Line a regular sized muffin pan with muffin papers and set aside.

In a large bowl, combine the crumb topping ingredients and stir to combine into large chunks. Set aside.

In a small bowl, add vinegar to half and half and set aside. In a large mixing bowl of a standing mixer, combine the flour, sugar, salt and baking soda. With mixer on low, add the butter chunks, one at a time. Mix for about 2 - 3 minutes until mixture resembles a coarse crumble. Add eggs, vanilla, and half and half mixture. Beat on medium high speed for about 1 - 2 minutes until smooth.

Fill muffin papers about 2/3 full and top with a generous amount of the crumb topping. Bake for 18 - 20 minutes or until toothpick comes out clean.  Let cool in pan for 5 minutes and then remove to a cooling rack.  Store at room temperature for 3 - 4 days (if they will last that long ;) .

* - If you do not have cake flour, you can make your own with all purpose flour and cornstarch.  Here's the formula: Take one level cup of all-purpose flour, remove two tablespoons, and then add two tablespoons of cornstarch back in.  In other words, 1 cup all purpose flour - 2 tablespoons all purpose flour + 2 tablespoons cornstarch = 1 cup cake flour.

Senin, 05 Maret 2012

Curried Beef Lettuce Cups


Curried Beef Lettuce Wraps

Has it been a crazy busy day?  Then Curried Beef Lettuce Cups is just the recipe you need to add some peace and calm to your dinner time.  Incorporating Asian and Indian cuisines, Curried Beef Lettuce Cups pack a flavor punch from browned ground beef seasoned with garlic, fresh ginger root, serrano chilies, and slighty sweet and spicy curry powder.  The bright flavors of chopped fresh mint and basil and a squeeze of lemon juice further heighten the flavor of the dish.  Sweet, nutty, and mild Boston Bibb lettuce cups cradle the curried meat making the buttery and crispy lettuce an ideal accompaniment to the spicy meat.

Curried Beef Lettuce Cups is a flavorful entree that can be prepared in about 20 minutes.  Or better yet, make it a do-it-ahead meal and prepare it in the morning or even the day before.  A quick reheat in the microwave or on the stove top is all that is needed before you sit down at the dinner table to enjoy your home cooked meal.

Curried Beef Lettuce Cups

adapted from this recipe

serves 4

1 teaspoon sesame oil
1 tablespoon olive oil
1 medium onion, diced
3 garlic cloves, chopped
1 (1 - inch) piece ginger root, chopped
2 serrano chilies, remove half the seeds and chop chilies
1 1/2 lbs ground beef
2 tablespoons low sodium soy sauce
1 1/2 teaspoons curry powder
1/2 cup fresh mint, chopped
1/2 cup fresh basil, chopped
1/2 lemon, juiced
2 heads Boston bibb lettuce
1/2 red pepper, diced

In a large saute pan, heat oils over medium high heat and add onion, garlic, ginger root, and serrano chilies.  Saute for about 5 - 7 minutes or until the onions are translucent.

Add the ground beef and continue cooking until browned, about 5 - 6 minutes.  Stir frequently and break up and any large pieces of meat.  When browned, pour off any grease.  Add soy sauce and curry powder and stir to combine.  Cook for 3 - 4 minutes so the seasonings cook into the beef.

Meanwhile, separate the leaves of the lettuce to form cups.  Wash and dry thoroughly.

Stir the mint, basil and lemon juice into the cooked meat.  Spoon seasoned meat mixture into lettuce cups and top with the chopped red pepper.

Selasa, 28 Februari 2012

Vietnamese Caramelized Pork Tenderloin

Vietnamese Caramelized Pork Tenderloin
The combination of sweet, salty, and spicy has always been a favorite of mine.  Add in grilled meat with a caramelized rub and tender crisp vegetables, and it is a perfect meal for me.  Vietnamese Caramelized Pork Tenderloin is a quick fix meal which has all the bells and whistles for an unforgettable dinner.

If you are a fan of Asian inspired dinners and want something healthier than take out from your local Chinese restaurant, this is the meal for you.  The dinner takes at most 20 minutes to prepare, and the cast of characters features pork tenderloin, snow pea pods and fresh bean sprouts.  A host of seasonings give the dish a truly authentic Asian taste and include rice wine vinegar, fish sauce, soy sauce and Sriracha which is a Thai hot sauce.

Print out the recipe and pick up the ingredients at the grocery store today.  You will be ecstatic when you make Vietnamese Caramelized Pork Tenderloin for dinner tonight.


Vietnamese Caramelized Pork Tenderloin

serves 4

for dressing --
2 teaspoons honey
2 tablespoons rice wine vinegar
1 tablespoon lime juice
1 teaspoon fish sauce
1 teaspoon Sriracha
1/2 teaspoon garlic powder

1 1/2 pounds pork tenderloin, sliced lengthwise and then into 2 inch pieces
2 teaspoons fish sauce
2 teaspoons Sriracha (hot chile sauce)
1/2 teaspoon garlic powder
1/4 teaspoon salt
1/4 teaspoon pepper
3 tablespoons brown sugar

2 teaspoons sesame oil
1/2 red bell pepper, diced
1/2 of small onion, thinly sliced
2 cups snow pea pods
1 1/2 cups fresh bean sprouts
1 tablespoon soy sauce
1/4 cup fresh cilantro, chopped

In a small bowl, combine the ingredients for the dressing and set aside.

Heat a grill or grill pan to medium high heat.  In a small bowl, combine the fish sauce, Sriracha, garlic powder, salt, pepper, and brown sugar.  Rub on pork tenderloin pieces.  Grill pork for about 4 - 6 minutes per side or until pork is just cooked through.  Watch closely so it does not burn.  Remove from grill and place on a platter.  Drizzle with the dressing.

In a saute pan, heat the sesame oil and add the red pepper and onion.  Stir and cook for 3 - 5 minutes until tender crisp.  Add the snow peas and bean sprouts and cook an additional 2 - 3 minutes.  You want the vegetables to remain crisp but slightly tender.  Add the soy sauce and toss to coat.

To serve, place some of the vegetables on each plate and top with the caramelized pork.  Sprinkle with cilantro.

Sabtu, 18 Februari 2012

Flourless Peanut Butter Chocolate Chip Banana Cookies!


Flourless Peanut Butter Chocolate Chip Banana Cookies

Nothing compares to a home baked cookie.  The aroma of peanut butter or chocolate chip cookies baking is intoxicating.  It draws anxious kids and adults alike to the kitchen hoping to grab one of the first warm cookies from the oven.

With the hundreds of thousands of cookie recipes in cookbooks, magazines, on food blogs, and passed down through generations of home cooks, there is a cookie recipe that appeals to everyone.  Add Flourless Peanut Butter Chocolate Chip Banana Cookies to your list of must try cookies.  With a short list of ingredients, the peanut butter, chocolate, and banana flavors shine in this chewy cookie.

Bake a batch today.  The most inviting kitchen is one with a full cookie jar.

Flourless Peanut Butter Chocolate Chip Banana Cookies

adapted from this recipe from Bon Appetit, September 1999

makes about 30 (3-inch) cookies

1 cup creamy peanut butter
1 cup packed light brown sugar
1 ripe banana, mashed
1 large egg
1 teaspoon baking soda
1 teaspoon vanilla extract
1/4 teaspoon cinnamon
1 cup semisweet chocolate chips

Preheat oven to 350 degrees.  Line 2 large baking sheets with parchment paper and set aside.

In a large bowl, combine peanut butter, brown sugar, banana, egg, baking soda, vanilla extract, and cinnamon using a standing or hand held mixer.  Beat for about 3 - 4 minutes.  Add the chocolate chips and mix to just combine.

Drop by rounded tablespoons of dough on baking sheets about 2 inches apart.  Bake for 10 - 11 minutes or until cookies are golden brown and still slightly soft in the middle.  Cool on sheets for 2 - 3 minutes then transfer to a cooking rack.  Store in an air tight container for 3 - 4 days or freeze for up to 2 months.

Selasa, 14 Februari 2012

Sauteed Winter Slaw with Maple Vinaigrette

Sauteed Winter Slaw with Maple Vinaigrette

Dress up a plain Jane seared chicken breast with the belle of the ball side dish of Sauteed Winter Slaw with Maple Vinaigrette.  The vibrant hues of orange carrots, yellow butternut squash, green scallions and white turnips and parsnips jump out of the bowl to brighten any dinner plate.  The zip of apple cider vinegar and sweetness of maple syrup highlight the light vinaigrette which is dressing the tender crisp sauteed vegetables and fruit. A unique side dish can make the most ho hum entree seem.....well....not so ho hum.

Winter Slaw with Maple Vinaigrette

makes about 6 cups

1 small butternut squash, about 1 pound, seeded and cubed
4 medium carrots, peeled
2 medium turnips, peeled
3 parsnips, peeled
1 large Granny Smith apple, peeled and cut in wedges
4 tablespoons olive oil, divided
1 tablespoon maple syrup
3 tablespoon apple cider vinegar
1/2 teaspoon salt
1/4 teaspoon pepper
6 scallions, thinly sliced

In a large bowl, whisk  2 tablespoons of the olive oil, maple syrup, apple cider, salt, pepper and scallions.  Set aside.

Shred butternut squash, carrots, turnips, parsnips, and apples in a food processor using the medium shredding blade.  Heat a large saute pan over medium high heat and add 2 tablespoons of the olive oil.  Add the vegetables and fruit and saute, stirring occasionally for 6 - 10 minutes, or until they are tender crisp.  Place in bowl with the vinaigrette and toss to coat evenly.

Note - the inspiration for the recipe came from a personal chef friend of mine.  If you are in southern New Hampshire and looking for a personal chef, look up Patti Anastasia of Anastasia'sTable.

Jumat, 10 Februari 2012

Stir Fry Udon Noodles with Beef and Broccoli

Stir Fry Udon Noodles with Beef and Broccoli
I recently spied upon a new product while strolling the aisles of my grocery store - udon noodles.  The long, fat, and round Japanese noodles hold up well to a quick stir fry or as a staple in soup.  Taking only minutes to prepare, they are the star of Sir Fry Udon Noodles with Beef and Broccoli.


After a quick 15 minute marinade in a sweet and salty mixture, a few slices of beef tenderloin are seared in a hot wok.  Next, fresh red peppers and mushrooms along with the crisp broccoli florets take a stir fry around the pan.  The udon noodles and a sauce highlighted by honey and savory oyster sauce are mixed in with the vegetables.  Added back in is the beef for a final quick reheat, and the Asian noodle dish is ready to serve.


Stir Fry Udon Noodles with Beef and Broccoli

serves 4

marinade --
1 tablespoon low sodium soy sauce
1 tablespoon oyster sauce
2 teaspoons lemon juice
1/4 teaspoon sesame oil
2 teaspoons brown sugar

3/4 pound beef tenderloin, thinly sliced

sauce --
2 tablespoons oyster sauce
1 tablespoon soy sauce
1/4 cup water
1 tablespoon honey

4 teaspoons peanut oil, divided
1/2 red pepper, small dice
10 button mushroom, sliced
2 cups broccoli
1 (14.2 ounce) package udon stir fry noodles 

In a resealable bag, combine the ingredients for the marinade.  Add the beef and marinate for 15 minutes at room temperature.

Meanwhile, combine the ingredients for the sauce in a small bowl; set aside.

Heat a wok or large saute pan over high heat and add 2 teaspoons for oil.  Remove the beef from the marinade and quickly sear until it just begins to brown on all sides.  Remove to a bowl.  Add the remaining oil to the pan along with the red pepper and mushrooms.  Stir fry for 2 - 3 minutes.  Add the broccoli, cover pan and steam vegetables for about 2 - 3 minutes.  The broccoli should remain slightly crisp and not become mushy and fall apart.  Add udon noodles and sauce mixture and stir to coat.  Add beef back in and stir to just reheat.  Serve.

Senin, 30 Januari 2012

General Tso's Chicken


I have a confession to make.

When a client of mine recently asked if I could make General Tso's Chicken as part of his weekly menu.   I emphatically said,

"Of course I can!"

And in my head I said,

"I have never made it before, but how hard could it be?"

I have made Asian Beef and Noodle Bowls, Sesame Chicken and Stir Fried Bok Choy, Sweet and Sour Pork with Snow Peas and Carrots, and Beef and Sugar Snap Peas, as well as dozens of other Asian inspired dishes, but never General Tso's Chicken.  That is when a small amount of panic set in and my research began.

I scoured my cookbooks, culinary magazines and endless sites on the Internet and I combined a few recipes to come up with my own version of the popular Chinese take out entree.  After giving it a test run in my home kitchen (and with thumbs up all around the dinner table), I set off to my client's kitchen on a crisp winter morning to prepare General Tso's Chicken along with Pork Tenderloin Marsala, Creamy Chicken Enchiladas, and Grilled Bison Steaks with Balsamic Reduction.  The assembling and cooking of the General Tso's Chicken went off without a hitch.  A little background prep on a recipe and a dose of confidence in the kitchen helped me create a memorable dish.

Occasionally you need to go out on a limb and try something you never had before.  Some might think that trying a new recipe is not a big deal.  But people get in a rut and cook the same dishes night after night after night.  If you have not made General Tso's Chicken before, give it a try this week.

Confidence is key.

General Tso's Chicken

serves 4

3 eggs, beaten
1/2 cup cornstarch plus 2 teaspoons, divided
1 1/2 pounds chicken tenders, cut in 1-inch chunks
2 tablespoons rice wine vinegar
3 tablespoons rice wine
3 tablespoons sugar
1/2 teaspoon ginger
3 tablespoons low sodium soy sauce
safflower or peanut oil
8 dried chili peppers
1/4 teaspoon red pepper flakes

4 cups cooked jasmine rice

In a large bowl, combine the eggs and 1/2 cup cornstarch.  Add the chicken and toss to coat.  Set aside.

To make the sauce, in a small bowl combine the 2 teaspoons cornstarch, rice wine vinegar, rice wine, sugar, ginger, and soy sauce.  Set aside.

In a large saute pan, heat about 1 inch of oil over medium high heat.  Add the chicken in batches (do not crowd the pan) and cook until just cooked through and lightly browned.  Remove from pan to paper towels.  Drain out all but about 1 tablespoon of the oil.

Over medium high heat, add chicken back to the pan and add chili peppers.  Cook for 30 seconds being careful not to burn the peppers.  Add in the sauce mixture and toss with the chicken and peppers for about 1 minute.

Sprinkle with the red pepper flakes and serve over jasmine rice.

Rabu, 18 Januari 2012

Orange Glazed Chicken with Toasted Almonds

Orange Glazed Chicken with Toasted Almonds

In a dinner jam?  Get a little help from a breakfast staple to make your ho hum chicken breasts shine as the star of your dinner.  Orange juice is the main ingredient in the velvety sauce which coats pan sauteed chicken breasts.  Add in the crunch of toasted almonds and dinner will be ready in about 20 minutes.

Toasting almonds is an easy way to add another taste dimension to your dish.  A simple way to toast nuts is in a small pan over the stove.  Place the nuts in a pan over medium high heat and stir or shake the pan often so the nuts do not burn.  In about 5 - 6 minutes you will smell the toasty almonds that will be lightly browned and ready to enjoy.  Remove the almonds from the pan immediately as the hot pan will continue to cook the nuts and they will burn.

The inspiration for this recipe came from the Cuisine at Home Weeknight Menus cookbook which I got as a free gift when I renewed my subscription a couple years ago.  I am a cooking magazine junkie and Cuisine at Homemagazine is one of my go-to sources for quick dinner recipes for my family and my EAT! A Personal Chef Service clients.  The recipes offer impressive results with minimal effort.

By using ingredients you have in your refrigertor and pantry, dinner can be on the table in a flash.  Serving a dish that is a little out of the ordinary keeps dinner time interesting and your family will be coming back for more.


Orange Glazed Chicken with Toasted Almonds

adapted from a recipe in Cuisine at Home Weeknight Menus cookbook

serves 4

4 chicken breasts, boneless and skinless about 6 ounces each
salt
pepper
1/4 cup flour
1 tablespoon olive oil
3/4 cup orange juice
1/3 cup white wine
2 teaspoons Dijon mustard
2 tablespoons butter
4 thin orange slices, halved
3 tablespoons slivered almonds, toasted
2 tablespoons fresh parsley, finely chopped

Season chicken with salt and pepper and dredge in flour.  Heat a nonstick saute pan to medium high heat and add the olive oil.  Add the chicken and saute for 3 - 5 minutes or until golden brown and cooked through.  Remove from pan and keep warm.

In the same pan over medium high heat, add orange juice, wine and mustard.  Whisk to combine and reduce liquid by half.  Turn heat to low and whisk in the butter.  Return chicken to pan and add orange slices and heat through.  Sprinkle with almonds and parsley and serve.

Rabu, 04 Januari 2012

Chicken Parmesan Sliders


Chicken Parmesan Slider
We are getting back to the family dinner table at our house.

After a busy few weeks surrounding Thanksgiving, Christmas and New Year's, we fell out of the habit of eating dinner together as a family.   Sure we were all together for feasting on Christmas Eve and Day (I missed our family Thanksgiving dinner with an unfortunate case of the flu), but our typical weeknight meal was replaced with work, a track meet, or grabbing a quick bite at the local diner with friends.  I would love to say that each night at 6 p.m. we gather around the table for a well rounded meal with all family members present, but that is not typically the way dinner time flows in our kitchen.  We, like any other family, have made choices to participate in these activities and sometimes our family dinner time suffers.

When we returned home from visiting family in the Midwest, I made dinner for our family on Sunday night.  My Oldest had an invitation to go out with friends but declined.  She informed her friend,

"My Mom is making dinner tonight.  I am staying home."

So at 7:30 p.m. on a unseasonably warm winter evening in northern New Jersey, we all sat around our kitchen island and enjoyed conversation and 
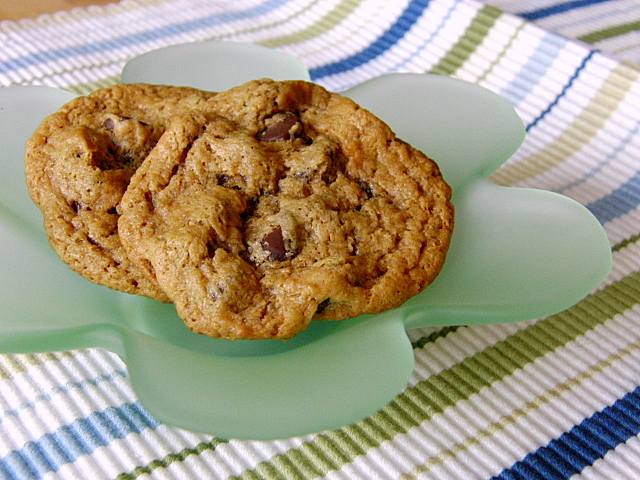
Chicken Parmesan Sliders.  Smal, thin chicken cutlets were panko and Parmesan cheese coated and pan fried to a crunchy crispiness.  Topped with a homemade marinara sauce, melted mozzarella cheese and served on mini buns, we chatted about our day's events and the upcoming week when most of the family would be going back to work and school.

For a half hour, we shut out the technology-filled world and just ate dinner.  We may make eating dinner together more than a weekly habit.

Chicken Parmesan Sliders

makes 16 sliders

for marinara sauce --
marinara sauce (either make your own with my recipe or use your favorite store brand)
1 tablespoon olive oil
1/2 cup diced onions
3 garlic cloves, chopped
1 (28 ounce) can whole plum tomatoes, crushed by hand or a potato masher
1 teaspoon dried basil
1 teaspoon dried oregano
1/2 teaspoon dried thyme
1/2 teaspoon fennel seeds
1/4 teaspoon red pepper flakes
1 teaspoon salt

for chicken --
4 chicken breasts, boneless and skinless
2 cups panko
3 eggs, beaten
1 cup flour
1/3 cup grated Parmesan cheese
1/2 teaspoon dried basil
1/2 teaspoon dried oregano
salt and pepper
about 1/4 cup olive oil

1 cup shredded mozzarella cheese
16 mini buns

Preheat oven to 450 degrees.

To make marinara sauce --

In a medium sized saucepan over medium high heat add oil, onions and garlic.  Saute, stirring occasionally until translucent, about 6 - 8 minutes.  Add tomatoes, basil, oregano, thyme, fennel seeds, red pepper flakes, and salt.  Stir to combine and continue cooking over low heat for 15 minutes.  Season to taste.  Keep warm.

To make chicken --

Place chicken on a cutting board and slice lengthwise into 2 thin cutlets.  Slice each cutlet into 2 smaller pieces.

Place a cooling rack over a baking sheet and set aside.

In three separate shallow dishes place (1) panko, (2) eggs, and (3) flour, Parmesan cheese, basil, oregano, and a 1/2 teaspoon salt and 1/4 teaspoon pepper.  In a large saute pan over medium high heat, add the olive oil.  Dredge the chicken pieces first in the flour mixture then the eggs and finally the panko.  Pan fry the chicken for about 2 - 3 minutes per side or until lightly browned and the chicken is cooked through.  Remove to cooling rack and sprinkle lightly with salt.  Continue frying chicken in batches until all have been cooked.

To assemble the sliders, leave chicken on the baking rack on top of the baking sheet and top each piece with about 2 tablespoons each of the marinara sauce and mozzarella cheese.  Bake in oven until cheese is melted; about 3 - 5 minutes.  Remove chicken from oven and place in buns.  Serve.

**Note - to make Chicken Parmesan Sliders ahead of time --  Prepare the chicken and marinara sauce, cool and package for the refrigerator until dinner time.  Reheat the chicken topped with the marinara sauce and cheese in a 400 degree oven for about 10 minutes before serving on buns.

Minggu, 01 Januari 2012

Overnight Creme Brulee French Toast


New Year's Day breakfast and a house full of kids = Overnight Creme Brulee French Toast.

It will take all of 10 minutes for you to prep this divine breakfast for your next overnight guests.  While my kids and their friends are still sleeping after a late night of New Year's fun with fireworks, ping pong, and Dance Dance revolution, I popped this overnight casserole in the oven for 30 minutes and breakfast is ready.  This French Toast is TO DIE FOR!  Thick slices of crusty bread soaked overnight in a creme brulee sauce and baked with brown sugar and butter.  It is a decadent dream come true!

Good thing it reheats well because I am not sure when they will wake up to enjoy it.

Happy New Year!!


Overnight Creme Brulee French Toast

serves 6

1 stick (1/2 cup) butter
1 cup packed dark brown sugar
2 tablespoons corn syrup
1 loaf (unsliced) crusty white bread
5 large eggs
1 1/2 cups half-and-half
1 teaspoon vanilla
1 teaspoon triple sec

In a small heavy saucepan melt the butter with the brown sugar and corn syrup over moderate heat, stirring, until smooth and pour into a 13- by 9- by 2-inch baking dish. Cut six 1 1/2-inch thick slices from the center portion of the bread, (reserving the ends for croutons). Arrange the bread slices in one layer in a baking dish or casserole, squeezing them slightly to fit.

In a bowl, whisk together the eggs, half-and-half, vanilla, and triple sec until well combined and pour evenly over the bread. Chill bread mixture, covered, at least 8 hours and up to 1 day.

Preheat the oven to 350° F. and bring the bread to room temperature.

Bake the french toast, uncovered, in the middle of the oven until puffed and edges are golden, 30 to 35 minutes.

Serve sprinkled with powdered sugar and topped with berries.

*recipe adapted from one by personal chef Jim Gray